As far as plugin should be integrated with your existing Instagram account/feed. To do this, you should have the following:
- A Facebook Developer Account;
- An Instagram account with photos;
- Your public WordPress website.
Create Facebook App
Go to developers.facebook.com, click My Apps, and create a new app. Once you have created the app and are in the App Dashboard, navigate to Settings > Basic, scroll the bottom of page, and click Add Platform.
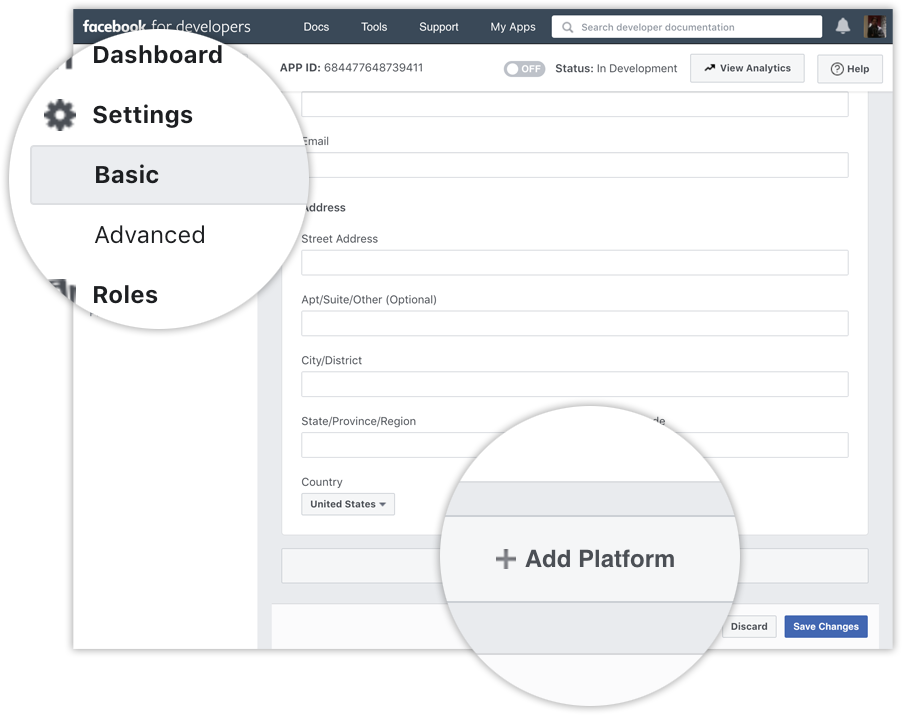
Choose Website, add your website’s URL, and save your changes. You can change the platform later if you wish, but for this tutorial, use Website.
Configure Instagram Basic Display
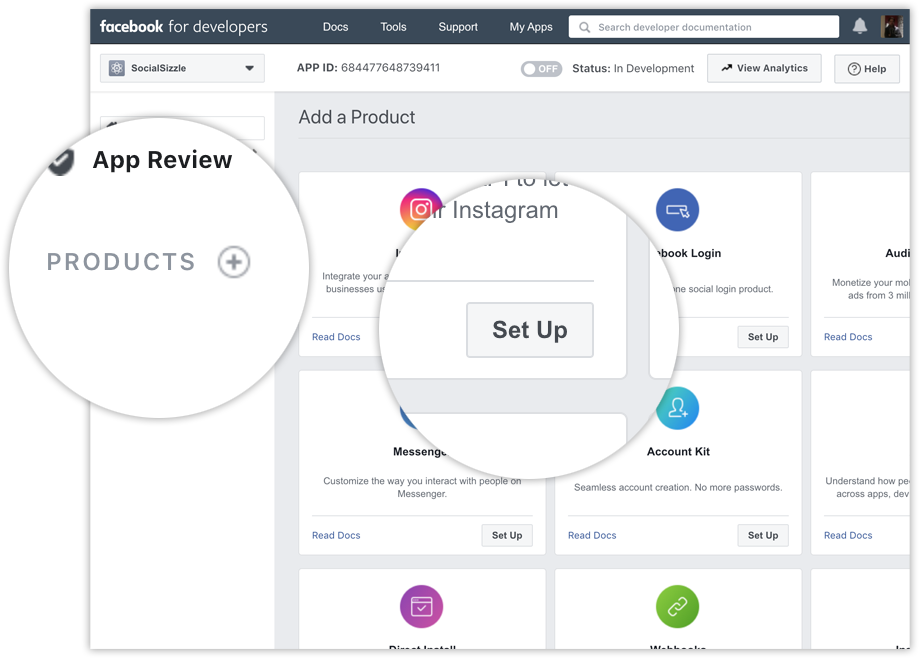
Click Products, locate the Instagram product, and click Set Up to add it to your app.
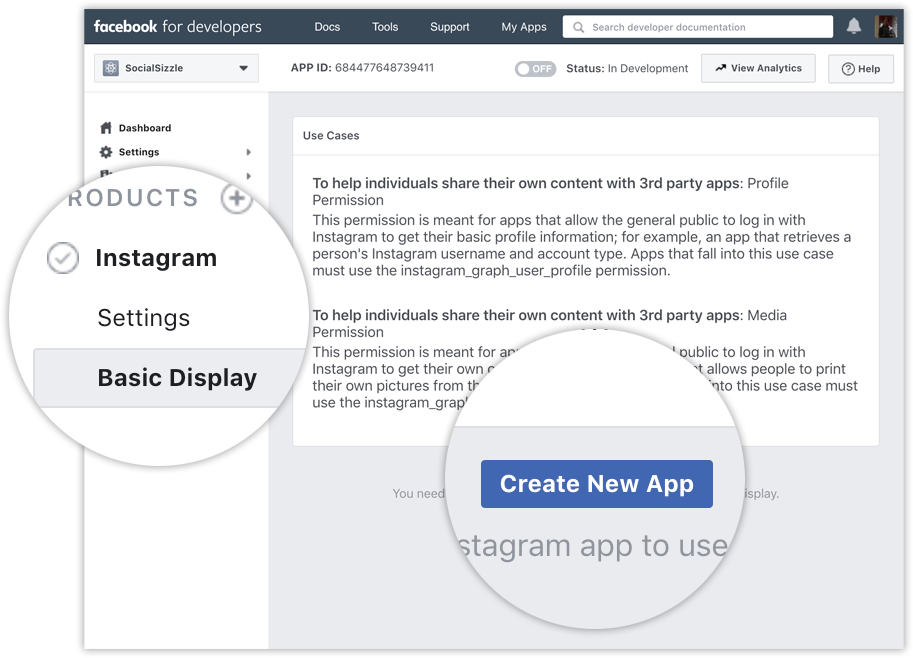
Click Basic Display, scroll to the bottom of the page, then click Create New App.
In the form that appears, complete each section using the guidelines below.
Display Name
Enter the name of the Facebook app you just created.
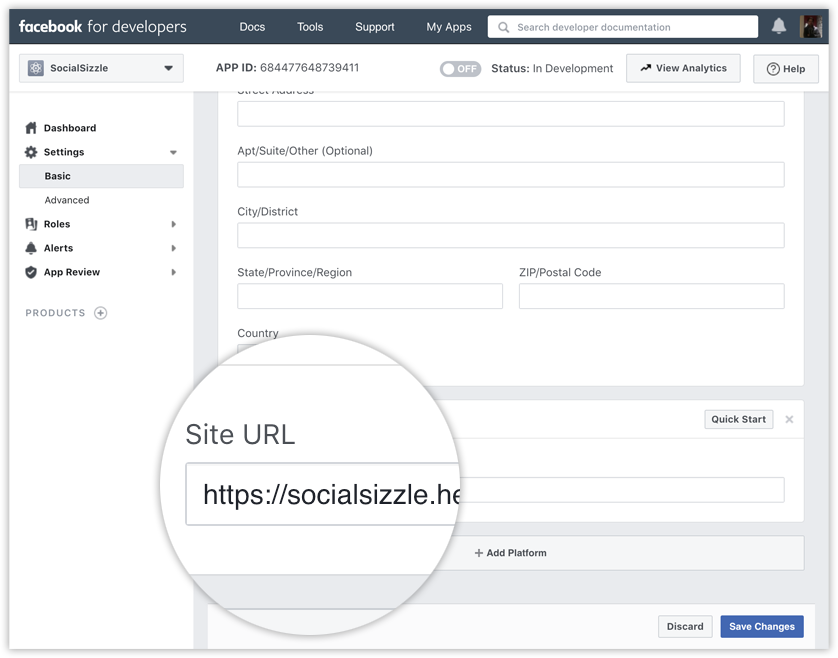
Valid OAuth Redirect URIs
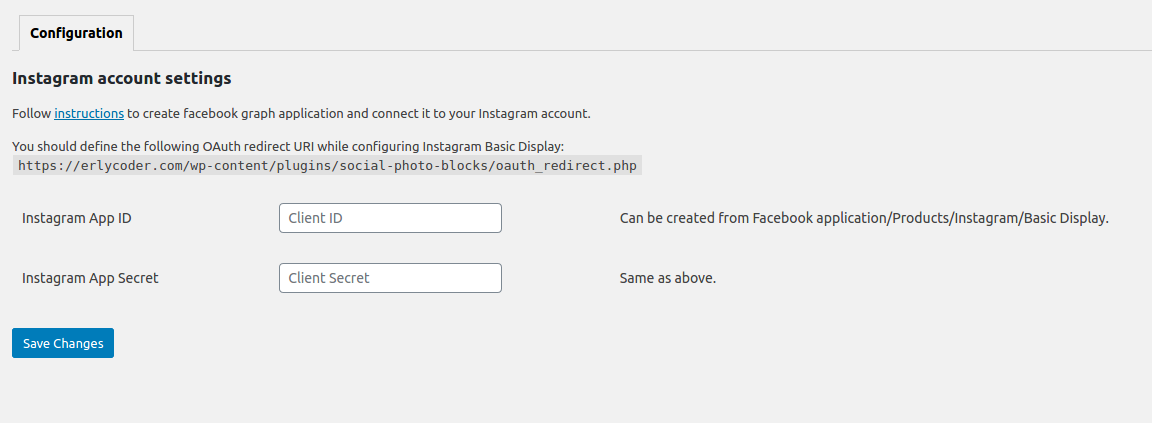
You should take this URL from the Social Photo Blocks plugin settings on you website.
For example: https://website.com/wp-content/plugins/social-photo-blocks/oauth_redirect.php
After you enter a URL, save your changes and check the URL again; we may have appended a trailing forward slash depending your URL structure. Copy the complete URL somewhere since you will need it in later steps to get authorization codes and access tokens.
Deauthorize Callback URL
This URL is not used by the plugin, so you can fill it with some.
For example: https://website.com/wp-content/plugins/social-photo-blocks/deactivate.php
Data Deletion Request Callback URL
This URL is not used by the plugin, so you can fill this with the same as deauthorization one.
App Review
You can skip this section, as far as we are not going and will not have to publish this Facebook App.
Now we should have Instagram App ID and Secret.
Social Photo Blocks Plugin Configuration
Fill the configuration form with the Instagram App ID and Instagram App Secret that were obtained on the previous step and click “Save”.
Now you should click “Login with Instagram” to grant your WordPress website some permissions to access your Instagram account.
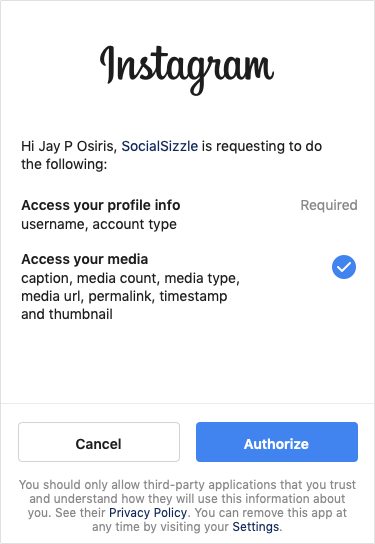
It is important to mention here, that rights are granted to your website directly, not some third party service that will be able to collect information about you.

And that is it. Now you can click “Refresh cache” button and start using Guttenberg blocks and shortcodes.